Classic Cream Puffs Filled with Sweet Vanilla Perfection
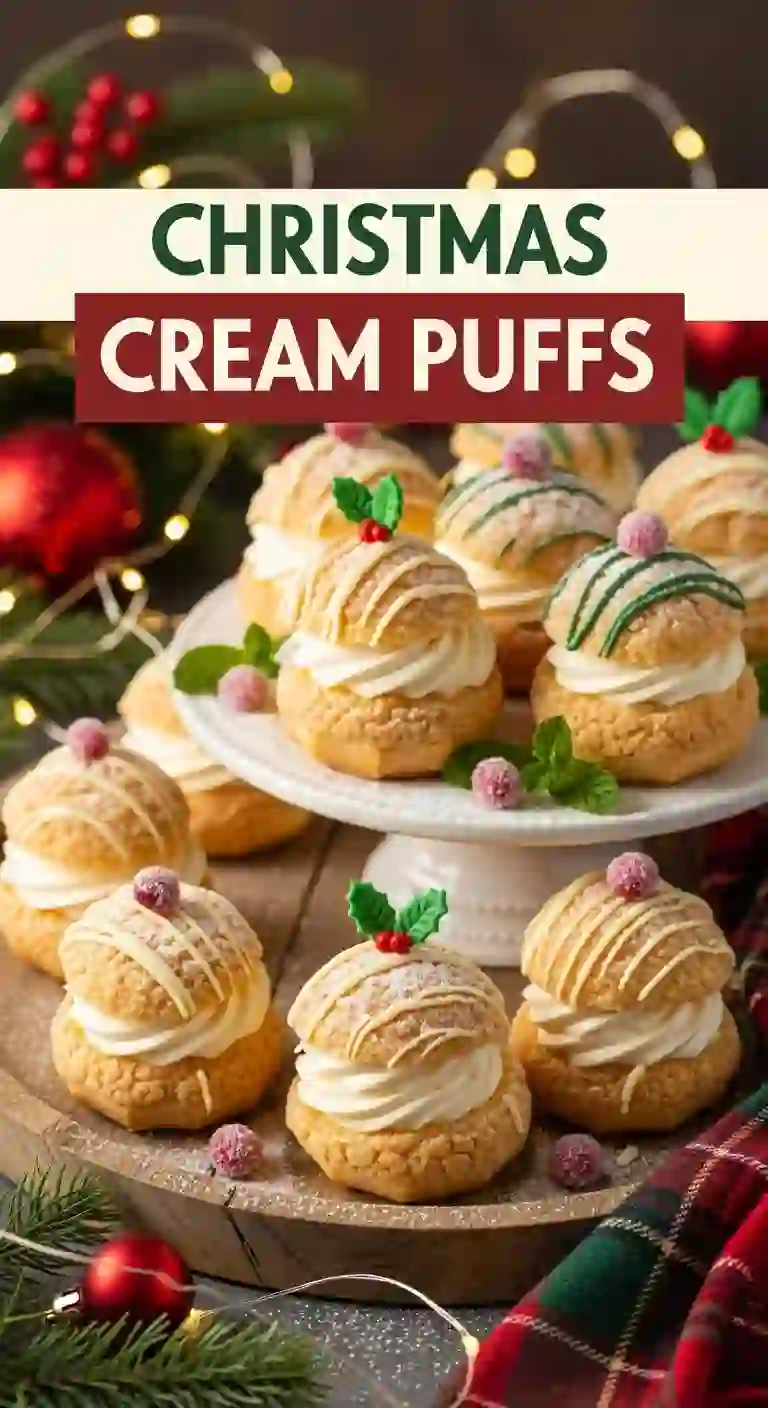
Delicate, airy, and irresistibly creamy — Cream Puffs are a classic dessert that never goes out of style. With their golden shells and luscious fillings, these pastries strike a perfect balance between lightness and indulgence. The crisp choux exterior gives way to a velvety center, making each bite pure satisfaction.
I still remember the first time I baked them for a family celebration — the excitement of watching the puffs rise in the oven and the aroma of warm pastry filling the kitchen. Once filled with a cloud of sweet whipped cream or silky custard, they became an instant favorite. Their elegance and simplicity make them suitable for any occasion, from intimate tea parties to festive gatherings.
If you want a dessert that feels both comforting and refined, Cream Puffs deliver that perfect harmony every time.
Also Try: Mini Pumpkin Cheesecakes
Perfect For
- Holiday and family gatherings
- Elegant tea parties
- Birthday celebrations
- Dessert buffets
- Afternoon treats
Why You’ll Love This Recipe
- Light and Airy Texture: The choux pastry bakes up perfectly crisp on the outside and hollow inside.
- Flexible Fillings: Customize with whipped cream, custard, or even chocolate.
- Elegant Yet Easy: Despite their bakery-worthy look, Cream Puffs use simple ingredients and steps.
- Make-Ahead Option: Prepare the shells ahead, fill before serving.
- Fun to Decorate: Dust with sugar, drizzle with chocolate, or top with berries for flair.
Preparation and Baking Details
Total Time: 1 hour
Prep Time: 20 minutes
Bake Time: 25 minutes
Cooling Time: 15 minutes
Servings: 12–15 puffs
Calories: About 100–120 per puff
Ingredients
For the Choux Pastry
- 1 cup water
- ½ cup unsalted butter
- 1 cup all-purpose flour
- ¼ teaspoon salt
- 4 large eggs
- 1 teaspoon vanilla extract (optional)
For the Cream Filling
- 1 cup heavy whipping cream
- 2 tablespoons powdered sugar
- 1 teaspoon vanilla extract
Optional Garnish
- Powdered sugar
- Melted chocolate
- Fresh berries
Ingredient Highlights
- Choux Pastry: Creates that iconic hollow puff structure.
- Heavy Cream: Whipped to soft peaks for a smooth, airy filling.
- Vanilla Extract: Adds a warm sweetness that ties it all together.
Step-by-Step Instructions
Step 1: Make the Choux Pastry
- Preheat Oven: Set to 425°F (220°C) and line a baking sheet with parchment paper.
- Prepare Base: Combine water and butter in a saucepan; bring to a gentle simmer until butter melts.
- Add Flour: Stir in flour and salt quickly, cooking until the mixture forms a smooth ball that pulls from the pan sides.
- Cool Slightly: Let the dough rest for about 5 minutes before adding eggs.
- Incorporate Eggs: Add one egg at a time, mixing until smooth and glossy. Stir in vanilla if desired.
Step 2: Shape and Bake
- Pipe Dough: Transfer dough to a piping bag with a round tip. Pipe 1½-inch mounds onto the baking sheet.
- Smooth Tops: Lightly dampen your finger and flatten any peaks.
- Bake: Bake 20–25 minutes until golden brown and puffed. Avoid opening the oven during baking.
- Cool: Remove from oven and let cool fully on a wire rack.
Step 3: Prepare the Filling
- Whip Cream: Beat cream, powdered sugar, and vanilla until stiff peaks form.
- Fill Puffs: Once cooled, cut a small slit in each puff and pipe in whipped cream until filled.
Step 4: Garnish and Serve
- Dust with powdered sugar or drizzle with chocolate.
- Serve immediately or refrigerate for up to two hours.
How to Serve
- Dessert Table: Display elegantly on a platter with fruit and chocolate.
- Gift Idea: Pack individually for party favors.
- With Tea or Coffee: Enjoy as a light afternoon treat.
- Showstopper Dessert: Stack into a cream puff tower for special occasions.
Additional Tips
- Cool Completely: Prevent sogginess by filling only after shells are fully cooled.
- Use the Right Tip: A round piping tip gives smooth, uniform shapes.
- Avoid Overfilling: Too much cream can soften the pastry.
- Make Ahead: Store baked shells for up to 2 days and fill later.
- Try Variations: Swap whipped cream for custard or mousse for variety.
Recipe Variations
- Chocolate Cream Puffs: Fill with chocolate mousse or ganache.
- Custard-Filled Puffs: Use pastry cream for a richer version.
- Lemon Cream Puffs: Add lemon zest or curd for brightness.
- Berry Puffs: Mix fresh berries into the filling.
- Gluten-Free Puffs: Substitute gluten-free flour blend.
- Mini Puffs: Make bite-sized for parties.
- Coffee Cream Puffs: Add instant coffee to the cream.
- Raspberry Puffs: Swirl raspberry puree into filling.
- Nutty Puffs: Add finely chopped nuts to the cream.
- Churro Puffs: Dust baked shells with cinnamon sugar.
Freezing and Storage
- Refrigerate: Store filled puffs in an airtight container for up to 2 days.
- Freeze Unfilled: Keep unfilled shells frozen for 3 months; thaw before filling.
- Make-Ahead: Bake and freeze shells, then fill just before serving.
Equipment Needed
- Piping bag with tip
- Electric mixer
- Baking sheet
- Parchment paper or silicone mat
- Cooling rack
- Pastry brush
Frequently Asked Questions
Can I use a different filling?
Yes, custard, chocolate ganache, or even ice cream work beautifully.
How do I prevent collapse?
Bake until golden and avoid opening the oven mid-bake.
Can I make the pastry ahead?
Yes, store baked shells for up to 2 days and fill before serving.
Can I freeze them?
Freeze unfilled shells and fill after thawing.
Why didn’t my puffs rise?
Check that your oven is fully preheated and dough consistency isn’t too thick.
How to prevent soggy puffs?
Always cool completely before adding filling.
Conclusion
Cream Puffs are a dessert that brings elegance and delight in every bite. Their crisp pastry and soft, cloud-like filling make them both sophisticated and comforting. The best part? You can tailor them endlessly — from chocolate and fruit-filled versions to mini party bites.
Whether served at a celebration or enjoyed as a personal treat, these puffs will always impress. Once you’ve made them yourself, you’ll never need a bakery version again — just light, dreamy perfection from your own kitchen.